

The Mission: Dawn Attack
The List
Beastlord, General, shield, warrior bane, ironcurse icon
Great Gray-Shaman, Level 4, Lore of Shadow, dispel scroll, obsidian
lodestone
Bray-Shaman, Level 1, Lore of Death, Scroll of Shielding, Wildheart
Bray-Shaman, Level 2, Lore of Death, Power Stone
Bray-Shaman, Level 2, Lore of Death, Shard of the Heardstone
Wargore, BSB, Standard of Discipline
26 Ungore
50 Gore
5 Ungore Raiders
5 Ungore Raiders
5 Ungore Raiders
5 Harpies, Scout
5 Harpies
5 Harpies
55 Bestigor, Banner, Manebane Standard
Donovan is a member of the Leadership 2 group. With his vampire hoards and Orcs &
Goblins squig hoards, he has historically done quite well. The year (2012) I went 4-1 at QCR; he
was my only loss and took Best General for his trouble (Vampires). He was also playing at table 1 at
Adepticon (2013) versus Brian Moyar’s warriors of chaos (Orcs &
Goblin). So a really good player,
even if he has a lower tier army (Though I still hold the position that a great
player can make any army time good, even if the list is limited with that army
book).
Now that I’m thinking about it this list fits in with his other 2
armies. 2 big hoards (Bestigor,
Gore or 2 Squig Herds or 2 Grave Guard and 1 ghoul) with a character bunker
behind (ungore or goblins or skeletons) with characters or other items buffing
the fighty units (2 mortis engines or shadow magic or throwing fanatics through
to slam opponent as they enter combat).
Well, it’s a recipe that Donovan has been quite successful with.
This list comes with a little bit of punch. He’s generating a free 4 dice a turn, with an additional 4
channels; which should net him a capped 12 dice probably 50% of the time. I suppose his best case would to be
roll 4 or less, and then spit out triple his opponent’s ability to defend
himself. To back all that up, he
has lower initiative (miasma) follow up with both purple sun and pit of
shades. Also that leadership 10
bubble gives a mighty mindrazor and triple spirit leech (I know spirit leech’s
unmodified has been faq’d away – is the same true for mindrazor, or is it still
only…only strength 7 – as if that’s not enough in 9/10 cases). Oh, and don’t forget about the power
stone.
The obsidian lodestone combined with scroll of shielding gives him
great magic protection all the time and awesome protection once. With the characters coasting behind 50+
man blocks and 6 units of chaff, no true ward saves are really needed with
magic resistance giving it to all.
And I had zero idea how I was going to go through 2 units of 50+ when I
didn’t want to also get death magic’d to death.
Magic
For magic my casters rolled Spirit Leech, Soul Blight, Doom and
Darkness and Purple Sun. My metal
caster rolled Glittering Scales and Gehennas Golden Hounds. I think this is the first time I didn’t
bother defaulting to Searing Doom.
I think the only armor he had was his general and bsb. The units might have had a 5+, but
their size was just way too much for searing doom to even touch.
For his magic he rolled Miasma, Withering, Pit of Shades and
Mindrazor. His death casters took
Spirit Leech/Purple Sun, Carass/Doom and Darkness and a second Spirit
Leech. So 3 kill spells and 2
spells to combat with Miasma.


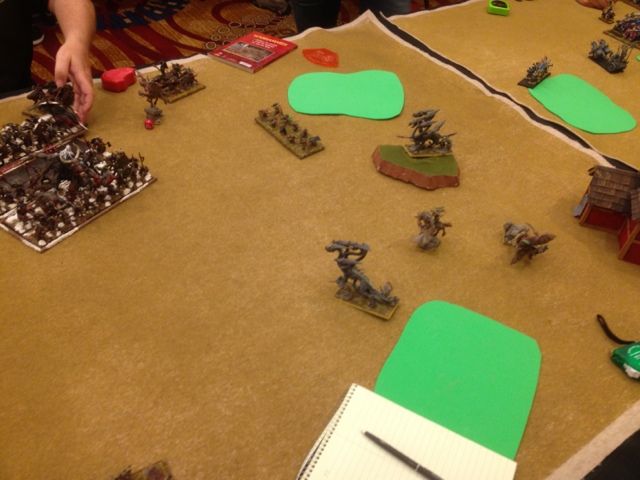
Deployment
We rolled off and Don got the chance to deploy first. He and I had a different interpretation
of the rules. He rolled all his
units before putting one on the table.
I rolled one and then deployed it before rolling the second. Not sure how it would have effected
things.
For deployment, Donovan rolled his character bunker on the left (next
to the massive herdstone), and the fighty block on the other side. 1 of the harpy units rolled a 1 as
well, and the rest went in the center.
The last flighty block rolled a 2 and got to go way on the other
side. Donovan deployed both the
character bunker and the far left unit facing center so that they could make a
mad dash together to make it into leadership range. Something to note, Donovan first deployed the far right unit
on the left, as he thought both a 1 and a 2 meant left (well, my left anyways).
For my deployment I rolled 1s for both harpies. Dark riders and characters rolled
center, with a hydra rolling a single 2.
This was fine with me, I didn’t want my hydras anywhere near his death
magic.
As he didn’t scout his scouting unit of harpies (told me he forgot), I
scouted and vanguarded without competition. Not sure why I deployed the shades on the right. I guess I figured since the unit wasn’t
facing forward I could start putting some pressure on, but with 50 models I
would need a lot of pressure.
I rolled, but did not get the 6 to steal the first turn, but I think
that ended up being for the best.


Turn 1 – Beastman
Even with some of the harpies in range to charge, Donovan did not
charge with his first turn. His
two blocks moved center, while the center fighty unit moved up. The skirmish shooters moved up
alongside the center block. The
left harpy pulled center. The
center harpy hid behind the right block, probably to replace the last unit in
the following turn. The last harpy
unit moved up and blocked my shades.
I’m fairly sure Don was concerned that the shades would charge the flank
of the beastman and try to get them to break, even though they were
steadfast. It’s something I may
have considered, but that’s putting 300 points at risk for the hopes that he
won’t roll a 6. I would rather
shoot them for 25% with everything for 1 turn and get that same test with zero
risk. We did agree that the
important thing was to make him make that panic test.
Donovan started off with a nice 12/6 magic phase (yay herd stone). I allow a miasma for initiative on my
hydra, lowering it to I1. Donovan
then fails Doom and Darkness on my general (trying to get him to break when he
killed the hydra). I then
dispelled a pit against the hydra, 6v6.
The very little bow shooting was ineffective.


Turn 1 – Dark Elves
With Don’s characters moving in the back of his deployment zone, and my
wanting to be able to move my shades as efficiently as possible, I made a long
charge with my left hydra onto the blocking harpies. They failed their terror test and moved out of the way of
the shades, and right next to the left block. I then asked a very important question – In the Dark Elf
book, Harpies do not cause panic.
Is this true in the Beastman book?
Don replied that it was not, that harpies do cause panic. I then forgot about my plan to shoot
with the shades, and recharged the harpies though the block and off the
table. The block then failed its
panic check, running through the harpies and off the table. The second harpy unit then decided it
had also had enough, and ran off.
So a solid 500+ points earned for me right off the bat (I actually
thought it was 800, having mixed up the two large units in my count).
A dark rider unit then charges into a unit of the skirmishers. Killing 1 unit would allow it to
overrun into a second, with the block no longer able to see it for the counter
charge. After seeing 20% of his
army run off the table, Don decides to hold.
I roll a 7/5 magic phase.
I put soulblight onto the skirmish unit in combat, and doom and darkness
on the 55 man center block, which he scrolls.
In shooting I kill 4 ungore off the character bunker, and 2 off the
third skirmish unit.
In combat, the dark riders kill3 and run down the unit and into the
next.


Turn 2 – Beastman
No charges for the start of his turn. I’m not sure he had any, maybe with the last harpy unit.
For movement, the bunker unit continues to try to come around the
impassible, and also get into 24” range of something worth casting magic
at. The last harpy unit moves to
chaff up the left most shade unit, probably because he was afraid I would rear
charge his leadership 10 steadfast unit (but why would I?)
Don rolled a natural 12/6 magic phase, no need for his silly
stone. I scroll a high roll on
miasma on my general. I then fail
to dispel spirit leech on the center hydra, but make all the regeneration saves
(2). He then throws 6 at pit with
no miscast, trying to get both my general and a hydra. It scatters off.
In combat, I kill the ungore unit.


Turn 2 – Dark Elves
To start things off, I charge the harpies on the left with my
shades. He started a 1” away, and
only rolled a 5, giving me an auto catch, which I take. My level 2 wizard charges the last unit
of ungore, since her magic was useless and she couldn’t shoot. Doesn’t take any on the stand and
shoot. This was a mistake as it
brought her into range of the death magic. I just should have hid her and used another unit of dark
riders.
I roll a 7/4 magic phase and start off with spirit leech on the
BSB. Don allows it, but forgets to
use his scroll of shielding. He
does manage to make both saves with just the loadstone, so no ill effect. He then dispels soulblight on his
bunker unit and I fail my 1 die power of darkness.
In shooting I knock like 5 off of both units. My wizard takes a wound and runs down the unit.

Turn 3 – Beastman
With only his 2 blocks and his characters left, there isn’t much Don
has available. The bunker unit
finishes coming around the herdstone and reforms back to horde.
He rolls a 12/5 magic phase (damn herdstone). I allow a spirit leech on my level 2, which does a single
wound. He then miasmas my general,
which I dispel. He fails doom and
darkness and then uses a second spirit leech on my level 2 to kill her. I don’t see in my notes any dice coming
back, so either Don was unlucky or he forgot.


Turn 3 – Dark Elves
My third turn finally has no charges. I move to begin to surround the bunker.
I roll a 4/2 magic phase, put doom and darkness and soulblight onto the
bunker unit. Don failed his dispel
attempt. My caster was using the
focus familiar to get within casting range while staying out of his casting
range. His bunker at this point is
basically as far up as it can get and maintain the herdstone and I’ve moved my
characters and hydras out of his range.
In shooting he passes his bunker’s panic test, and then I proceed to
wipe the unit out. I also put 1
wound on his level 1, 2 wounds on his level 4, 1 wound on his BSB and 1 wound
on his power stone. No dead
characters, but picking up the unit was nice.


Turn 4 – Beastman
Don’s turn 4 and he’s reeling.
The characters bolt into the last unit, but are no longer in range of
the herd stone – but are now in range to cast.
A small 4/3 magic phase probably saves my bacon. He fails to cast carass with 3
dice. He then uses his power
stone, to throw 3 at spirit leech.
I roll my 3 and fail to dispel.
He gets 2 wounds through on my general.


Turn 4 – Dark Elves
I move my hydras and caster back.
I then bring my harpies in to begin to chaff his unit to prevent the
chase. Seeing the writing on the
wall, Don concedes the game for a 13/7 win on my part. I think he could have earned at least 1
of those points back in the harpies I would have had to sacrifice to keep him
slow, but I rolled it off and would not have killed his unit nor stopped him
from passing even a rerolling 7 panic.
Plus even if I did, likely he would rally before I could charge push him
off. Oh well.
No comments:
Post a Comment